• Skip to main content
  • Skip to footer

RAM Claims Adjusting

Claim it the Right Way!

📱 (954) 260-4676    ðŸ“ž (305) 542-1799

  • Home
  • Free
  • About
    • About Us
    • Why RAM?
    • The RAM Team
  • Our Process
  • Gallery
    • Instagram Posts
    • YouTube Videos
  • FAQ
  • Contact
  • Blog

Types of Claims

Mold

Mold Inspection

Do you think mold might be growing somewhere in your home? If so then you should have a mold inspection performed.

Goals of a Mold Inspection

There are two goals of a mold inspection. The first is to find if and where mold is growing in your home. The second is to find the water problem which caused the mold to grow in the first place.

Why You Should Have A Mold Inspection

The obvious reason to have a mold inspection is if you think you have a mold problem in your home. Even if you already know where mold is growing in your home it is a good idea to perform a mold inspection since visible mold growth often means there is more mold growing somewhere out of view.

Signs of Mold

Some common reasons to suspect you could have a mold problem include:

  • You are suffering allergic symptoms
  • You notice a mold smell
  • You have had a water problem, for example: flooding, leaking pipes or a leaking roof

You can look here for more signs of mold problems.

Hiring a Professional Mold Inspector

It’s always best to hire a professional mold inspector to do the mold inspection for you. Thanks to mold inspectors’ experience and their knowledge of spots where mold most often hides, you can be sure that if there’s any mold in your home that they will find it.

Mold inspectors also use special equipment like moisture meters and fiber optics. This allows them to find hot spots where mold is most likely growing and look into hidden areas such as behind walls. This way they can find any and all hidden mold while barely disturbing your home.

History of Water Problems

It’s important to think of recent water problems you’ve had in your home when it comes to preparing for a mold inspection.

If you hire a professional mold inspector it’s a good idea to let them know about any leaks, floods or any other moisture problems you’ve had in your home. If you are performing the mold inspection yourself then knowing about places which had water problems in the past will give you clues about where the mold is most likely growing.

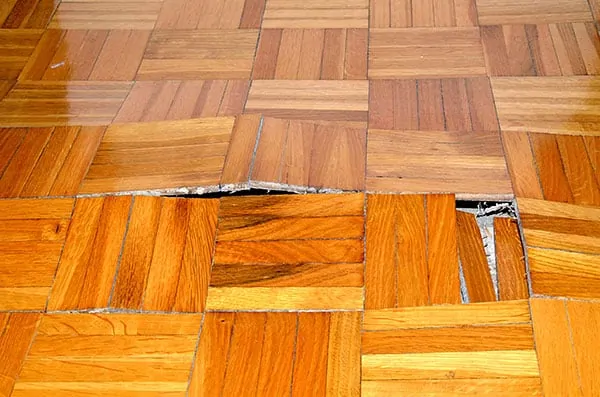
There might have even been water problems in the past which you never found out about. By looking for signs of moisture like warped surfaces, water stains or peeling paint you might find recent water problems which have lead to mold growth.

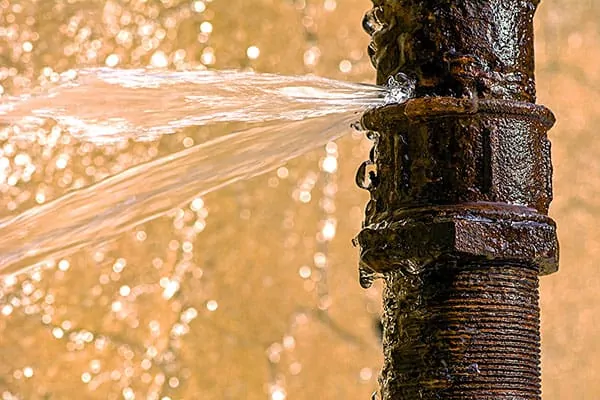
You should also identify areas which have the potential for water problems such as where pipes run, air conditioner leaks, possible leaking roofs or where water collects after flooding.

Finding Mold During the Inspection

If you decide to do the mold inspection yourself then you need to thoroughly search for mold in every room of your house including the attic and the basement.

Special attention should be paid to areas around water sources such as near the shower or bathtub, sinks or pipes. You should check especially carefully the areas which have had any history of moisture problems in the past. During your search for mold if you do find any water leaks this can then lead you to where mold is growing.

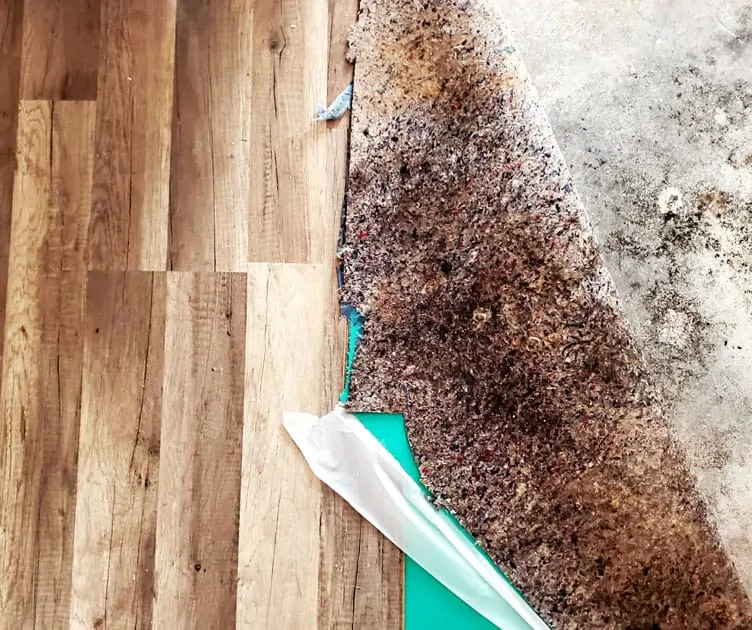
Some common places where mold often grows is on substances high in cellulose such as drywall, under carpets, in insulation or in ventilation ducts.

Visit Where Mold Grows for more help with finding mold and for more places where mold often grows.

Hidden Mold

If you cannot see mold in a room it doesn’t mean there is none there. Mold can often grow hidden from view behind walls, above ceilings, under floors or in air conditioning ducts. If you find small spots of mold on a surface it could mean there is a much larger mold colony growing hidden away on the other side.

Besides using your eyes pay attention to any odors. The smell of a mold colony can help you to narrow down where mold is hiding. Any health issues you notice which occur when you’re in certain areas of your home can also alert you to the presence of nearby mold. Symptoms such as sneezing and sore or water eyes can be tell tale signs of mold growth nearby.

Don’t Disturb Mold

If you do find large areas of mold during the inspection be careful not to disturb it if possible as this can spread spores or even mycotoxins throughout your home. Large mold colonies should only be disturbed once you have set up the proper containment during remediation.

Recognizing Mold

Sometimes you might find what you think is mold but what might actually be dark soot or just dirty spots. Look closely to be sure that what you have found is mold, disturbing it minimally if you need to examine it physically.

If you are unsure you can always use a mold test kit to verify. Testing can also be helpful if for some reason you want to identify the species of mold you have found in your home.

Finding Water Problems

The second stage of mold inspection after finding mold growth is to find the water problem that caused the mold in the first place. There is no point going to the trouble of finding and removing mold in your home if the water problem that caused it is not fixed and then soon causes the mold to return.

You should search your home for any water leaks or evidence of leaks. Besides stopping the leak or other water source you will need to take action to make sure it doesn’t reoccur in the future. Once you have found the cause of the mold in your home you will first need to fix it and then clean up any remaining moisture.

After Finding Mold

After you have found the mold in your home you need to determine the size and extent of the mold colony before you can begin to remove it. If the mold looks like it might be toxic you should think about having it tested to determine its species so you’ll know whether you can remove it yourself or whether you should hire a professional.

In either case you should not disturb any large mold colonies you find yet since proper containment should be set up before mold removal to prevent spores spreading throughout your home.

Mold Testing

After the mold inspection you might feel mold testing is warranted if you couldn’t find any mold. Mold testing can either rule out the presence of mold or help track down its location if it’s hidden.

If mold was found and you decide you want to test the mold to find out its species, eg in case it’s toxic or to confirm it really is mold, then testing will also tell you what you want to know.

Mold Remediation

Once you have found all the mold in your home you’re ready to move on to thinking about the mold removal and remediation process.

After you have removed and remediated a mold problem you might want to perform the mold inspection process again to make sure that the mold clean up was successful.

Fire Damage

While it’s true that you should not tackle fire damage restoration and cleanup without expert help, there are steps you may take at home. It’s tough to sit idly by after your home has been in a fire, but sometimes waiting is the best tactic.

First and foremost, after any fire damage scenario, safety should be your top concern. Most will tell you not to reenter the property. That tip is certainly true. By going back in, you risk serious injury and worse property damage.

What to Do After a Fire

We’ve compiled a few expert fire damage restoration tips to help homeowners like you come back stronger than ever after a disaster.

  • Limit any movement in the home to prevent further damage, spreading of smoke contamination and soot particles from embedding in fabrics.
  • Keep your hands clean to avoid damage to the walls, wood or upholstery.
  • For high-traffic areas, including carpet and rug, place down towels.
  • If the electricity has been shut off, which is highly likely, empty the freezer and refrigerator and open up the doors.
  • Wash any houseplants you have on both sides of the leaves.
    Swap out the filter on your heating and cooling system.

What Not to Do After a Fire

On the other hand, there are things to avoid.

  • Do not attempt to wash walls, painted surfaces, carpet or upholstery without professional help.
  • Do not attempt to clean electrical equipment or appliances that were damaged in the fire.
  • Do not use canned or packaged food stored near to the fire damage scene.
  • Do not turn on any ceiling fixtures if the ceiling is noticeably wet from the fire department, as the electrical wiring could be damaged.

Wind Damage

How Can I Prevent Wind Damage from a Storm to My Home?

Black clouds pile up on the horizon and start creeping toward your home. As they blot the sun, the pressure rises, filling you with anticipation, dread, and even a bit of excitement that lifts the hair on your arms and neck. What happens next may be hard to predict, but often the mighty winds of a strong thunderstorm can make a real mess of things. This is because severe thunderstorms can be capable of producing a tornado with little warning.

But even in the absence of an actual tornado watch, straight-line winds can come roaring through, thanks to the powerful downdrafts caused by sinking air in a storm cell. These winds can range from 50 mph to over 100 mph in speed, making them just as a damaging as tornado winds, as they topple trees, snap limbs, and cause damage to your home and vehicles. They can strip shingles from rooftops and push cars off the road. They have been known to knock manufactured homes off their foundation — even when they are anchored.

So, before the next storm arrives, we want to help you prepare your home and property for potential hazards so you can keep wind damage to a minimum. Then, when the storm arrives, you’ll know how to assess what happened and get it repaired promptly.

Prevention

Proper tree care

Look for signs of decay. In high winds, dead or weakened trunks and limbs are susceptible to breakage. Prevent decay with proper tree maintenance. Keep lawn mowers and weed trimmers from “wounding” the bark, and don’t over-prune branches. Over-watering can lead to shallow root systems, which will make them less able to stand firm in high winds.Roof

At least once a year, climb the ladder and give your roof a once-over. Check for loose or missing shingles and make sure the flashings are firmly in place. When it’s time to reroof, invest in weather-resistant shingles.Clear the yard

If a storm is heading to your area, bring in items that could be blown or pushed around in heavy winds. This includes patio umbrellas, deck chairs, gardening equipment, toys, and bicycles. Park vehicles inside your garage, or avoid parking directly under trees. Larger outdoor items such as patio tables, grills, and trash containers should be pushed up against the wall.

Assess the damage

After the storm, the first thing (after making sure your family and pets are safe), you need to examine your home thoroughly for damage inside and out.Stay safe

Don’t allow children and pets to go outdoors unsupervised until you can check the area for fallen trees, power lines, and other storm damage that could cause injury.Stay clear of fallen power lines

Do not touch downed power lines! In no shape, form, or fashion. Keep your distance, and don’t retrieve objects near to or touching the line. Call your utility company immediately.Fallen trees If a tree or large branch has fallen on your roof, evacuate the house until a professional from the fire department or a roofing contractor can assess the damage. Contact your insurance company as soon as possible.Shingles

Even if nothing heavy has landed on your roof, high winds can tear and peel away shingles. Search for signs of damage, such as loose or torn shingles, as well as new water stains on your ceiling or leaks in your attic.

Thunderstorms can turn violent and unpredictable with little notice, but you can minimize the potential for wind damage if you take a time to identify and correct any hazards. Your primary goal should always be keeping your family safe.

Laminate Floors

How to Save Your Laminate Floors From Water Damage

Laminate flooring and water do not mix. A number of floor coverings are considered impervious to water, such as ceramic or porcelain tile, luxury vinyl plank flooring, and especially sheet vinyl flooring. At the other end of the spectrum are floors like solid hardwood, bamboo, and engineered wood that you may want to think long and hard about prior to laying in a full bathroom with a shower or bathtub.

Laminate flooring falls in the latter camp. If inexpertly installed, laminate flooring will be a disaster in high-moisture environments. If installed according to manufacturer instructions, laminate flooring has, at least, a decent chance of standing up against the water.

Water Tests

What happens when water comes into contact with laminate flooring? Though laminate flooring industry specifications dictate tests for laminate flooring and water where the flooring is submerged under water for a full day, irreversible damage happens long before that.

Generally, laminate flooring with open edges will maintain its original dimensions after about two hours of submerged water exposure. After about four hours, the flooring begins to soak up water, and this is considered the point of no return. Higher temperatures will increase the rate of absorption. Boards that begin at 5/16-inch thick will swell to 7/16-inch thick or even more.

De-Lamination

Slowly the image layer and wear layer begin to de-laminate from the top of the board. Because laminate is a dense fiberboard, it takes over two full days to dry. Installed laminate flooring may take weeks to dry, if ever. After complete drying, the laminate flooring will never return to its original dimensions. Given this, it is absolutely critical that water is kept away from laminate flooring as much as possible.

flooring can get wet, but only the top. Laminate flooring sides, open seams, damaged areas, and bottoms can never get wet.Mop up standing water quickly, as water can migrate into laminate’s seams. The edge areas of the laminate are more of a problem since edges are cut and exposed. If the water has reached edge areas or open seams, thoroughly extract the water with a wet-dry vacuum.​If you install the laminate flooring in a full bathroom, you must take extreme precautions given by laminate manufacturers. Installation in guest or half bathrooms without precautions is acceptable because water is not prevalent as in rooms with bathing facilities. In these rooms, the main areas of concern would be around the toilet and below the sink.

When the water reaches under laminate flooring, the water must be removed immediately. If a small amount of water has leaked toward the edges of the flooring, pull up any quarter-round (shoe molding) or baseboards around the perimeter. If the water is not pervasive, you may be able to extract it with a wet-dry vacuum.Your best bet is to remove the affected floorboards. Floorboards that run parallel to the spill may be simple to remove (after the quarter-round and baseboards have been taken up) since the last course of parallel laminate boards should tilt upward. You can then progressively take up boards as far as you need. Floorboards that run perpendicular to the spill, as well as the first course of boards, cannot be removed so easily. In this case, you need to remove all of the laminate floorboards.

Many types of floors, not just laminate flooring, are subject to damage when hit with enough water. Solid wood flooring will warp and swell when water-logged. Since wood fibers in real wood run lengthwise, the weak direction is sideways. When natural wood bends in this direction, it crowns or cups. Even water-resistant floors like vinyl can be affected if the water works its way under the flooring and begins to degrade the paper backing.The difference between real wood and laminate is that real wood can potentially be saved. Even cupped or crowned wood can be sanded down flat. Laminate flooring cannot be sanded. Does that mean it cannot be fixed?While damaged boards cannot be repaired, they can be replaced on a one-for-one basis. Most installations use packs of laminate boards. Because there is a set number of boards in each pack, it is inevitable that boards will be left over. You or a previous owner may have stored extra laminate boards in a closet or attic. If the board is at the end, remove the baseboard and pull out the affected board. If the damaged board is at the center, cut it out, using a fine-finish blade on a circular saw.

Follow these rules for laminate installation in places where excessive moisture may be present, such as in full bathrooms and near kitchen sinks, dishwashers and ice makers.Fold the underlayment up against the wall two inches. After installing the flooring, cut excess underlayment down with a utility knife.Be sure to fill the laminate’s expansion areas. Laminate flooring always needs to have a perimeter zone around its edges. This is to allow for flooring and wall expansion and contraction. For flooring that you expect to get wet, this perimeter must be filled with silicone caulk.Remove the toilet for bathroom installations. Do not install laminate around the toilet. Instead, remove the toilet first, install the laminate, and then re-install the toilet. Leave a 1/4-inch expansion area between the laminate and the toilet flange.Add wall molding if appropriate. Molding has to be applied to the base of the shower pan or bathtub, and this area, too, must be filled with silicone caulk. As an alternative to using molding, you can leave a 1/4-inch opening and fill that perimeter area with silicone caulk.In problem areas, apply glue to the tongue portion of the plank, even for lock-and-fold type laminate planks. Do not flex the joints when applying glue. Glue must ooze to the surface as the laminate pieces are locked together. After locking and folding the joint, wipe off excess glue. Allow the floor to dry for 24 hours before using.

Iron Pipe Breaks

10 SIGNS YOU NEED TO REPLACE YOUR CAST IRON PLUMBING

Did you just buy a new home or build your own house? If so, you don’t have to worry about your plumbing. But most people live in homes built before 2000. If your home is older than two or three decades, there is a high probability your plumbing is outdated.

Is it Necessary to Replace Cast Iron Plumbing?

The danger is even greater for houses built before 1970 since chances are you have cast iron pipes. The age of the pipes and type of material used will affect when and if you will have plumbing issues. Cast iron was a popular choice for water and sewage pipes in the 20th century for a number of reasons:

  • Plastic piping hadn’t been invented yet
  • Cast iron pipes have a long life and were built to last for anywhere between 80-100 years
  • Cast iron plumbing is durable and can withstand heavy loads/high-pressure
  • The material deadens the sound of flowing water and sewage very well

In spite of their durability, it might be time for you to the replace cast iron pipes in your home. Why is that?

The original cast iron plumbing inside houses built in the 1930s and 1940s are reaching the end of their lifespan. Extreme weather changes, type of soil, and water quality will also affect plumbing longevity.

If you have mature trees in the yard, their root systems may grow extensively underground. At times, they can spread into the plumbing system and damage the pipes.

It’s not always easy to know if your pipes are damaged because most of them are hidden behind walls or in crawl spaces like the basement.

Unless you’ve recently renovated the kitchen or bathroom, odds are you haven’t checked on those pipes in a while. However, there are a few visible plumping signs that are a dead giveaway.

Here are the top 10 plumbing signs that you need to watch out for (especially if you have cast iron plumbing):

Discoloration

Do you occasionally find brown or yellow colored water coming out of your taps? Unless you live in a rural area or use water from a well, discolored water is a sign of damaged pipes.

Discoloration in the water is a result of corrosion or rust and cast iron pipes are especially vulnerable. Discolored water is the most visible sign that you need to replace cast iron pipes.

Leaks

Frequent leaks are another plumbing sign you should watch out for. It could be happening because of cracks in the pipes or damage caused by sulfuric acid. If the leaks persist even after repeated cleaning, you should have a plumber check them out.

Backups or Slow Draining

If you often experience slow draining when you flush the toilet or run water down the sink, it could be a sign that the cast iron sewer pipes are damaged. Unfortunately, cleaning products for unblocking pipes also contain sulfuric acid which is very damaging to iron pipes.

Odor

A sewer system in good condition should be airtight with the exception of a few vent stacks. Cracked pipes could cause sewer gas to escape which is certainly not healthy for you. If you can smell sewer gas anywhere in your home, it’s time to call the plumber.

Mold

Mold is another visible sign of damage. Some types of mold can start growing with as little as 55% humidity. A cracked pipe that leaks water behind your walls can easily cause the right conditions for mold growth.

Visibly Healthy Lawn

For humans, coming into contact with sewage is unhealthy. But it acts as a natural fertilizer for vegetation. If you notice your lawn is looking better even when you haven’t done anything, it could be a sign of leaking sewage.

If you see patches here and there, that could be where the pipes have developed leaks.

Indentations or Sagging

If a water or sewage line is cracked and leaks water, it can pool underneath your garden or pavement. Over the long-term, it can dissipate the soil and cause parts of the ground to sag. This type of indentation may be hard to spot but is a clear sign that your plumbing is not in the best condition.

Cracks

Cracks in the foundation or along the walls are an extreme symptom of damaged pipes. This often happens because the main line has a leak that was undetected. If you don’t replace the plumbing and repair the damage, it can cause sinkholes to appear!

Puddles

If you suddenly find puddles of water or sewage waste anywhere in the yard, it is a quite obvious sign that your plumbing is damaged. 9 times out of 10 the leak will be located directly underneath.

Rodent/Insect Infestation

Rodent or insect infestations are an indirect clue to damaged plumbing. Rats, cockroaches, sewer flies and other insects can get into your house through very narrow cracks in the pipes. Cockroaches can squeeze into pipes through gaps as small as the width of a quarter!

Rats don’t need much bigger openings either. Calling a pest-control agency will solve the problem albeit temporarily. The pests will keep coming back since you haven’t solved the source of the problem i.e. cracks in the pipes.

Regardless of the age of your house or the plumbing, you should periodically inspect the pipes. Any cracks, pools of water underneath a pipe, rust spots, and dimples are all plumbing signs you should watch out for.

Sometimes it takes more than a visual inspection to spot damage. If it has been a while since the last time you called a plumber, you can ask them to come over for an inspection. A comprehensive sewer video inspection will help you determine if the pipes need replacing.

Have you seen any of these plumbing signs in your home? Don’t delay calling us! Replace cast iron pipes now and prevent major repairs down the line. The cost of replacement will certainly be less than repairing the potential damage in future!

  • Page 1
  • Page 2
  • Go to Next Page »

Footer

RAM Claims Adjusting LLC
RAM Claims Adjusting Inc.
2101 Sw 101st Ave
Suite 205
Miramar, Florida 33025

Florida Licensed W021918
(305) 542-1799   Dade
(954) 260-4676   Broward
(407) 969-5664   Orlando
 [email protected]

Contact Us

Free Damage & Policy Review - footer

Follow us

  • Facebook
  • Instagram
  • LinkedIn

Claim It The Right Way!

Our Office

  • Home
  • Free
  • Team
  • About Us
  • Why RAM?
  • Process
  • FAQ
  • Videos
  • Instagram Posts
  • Blog
  • Contact
  • en English
    • en English
    • es Español

Copyright © 2025 · RAM Claims Adjusting Inc.  |  Privacy Policy  |  Terms Of Use